Wednesday, February 26, 2014

Academy Awards Party Snacks!


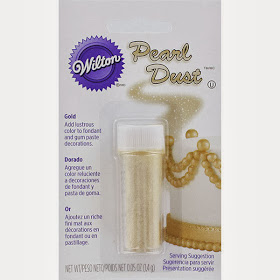
So. I am pretty obsessed with edible glitter dust. I discovered it in the cake decorating section of Michael's when I made these Oscars cupcakes for the first time a few years back, and have been hooked ever since.
I gifted some to a friend recently for her birthday, because, who doesn't need a little more shimmer in their life?!


Wilton Shimmer Pearl Dust

These adorable and festive mini cupcakes are pretty easy to decorate, although they don't all come out picture perfect.  But, they are delicious nonetheless, and the perfect treat during the Academy Awards show this weekend, and the most important part: the Red Carpet Arrivals!


Check out the recipe below, to make your own little star shaped stencil, and get to painting the roses, err, stars...gold.


Red Carpet/Academy Award themed mini red velvet cupcakes for your Oscar viewing party!

Enjoy!!


Thursday, February 13, 2014

Veggie Quiche and The Best Pie Crust Ever

Guess what, guys?
I don't like pie crust. Nope. Never have. I have tried all different types. And don't get me wrong, I love pie!!!
I just usually leave about half of the crust (the soggy bottom part is decent), and eat the good stuff, aka the filling!
I just think pie crust is dry and boring...or, at least I used to!

Enter. Stater Bros. refrigerated pie crust.
Gotcha! It's not even a secret homemade recipe!
It's a dang pre-made crust, with zero healthy ingredients, but who cares, because it is so delicious!


We have my good friend Lauren (Check out her Blog: Imperfect and Fabulous!) to thank for that one!
I am so glad she made her quiche for me, and I discovered this Stater Bros. pie crust!


To start, take the crust out of the fridge about 15min before you are ready to bake, so it will roll out a bit easier, and not crack.
Preheat the oven to 400, and roll the pie crust into a pie pan.


Poke it with a fork in a few places, and bake for 5-8min.  This prevents the crust from becoming soggy later.
To be honest, I think part of the reason I have never liked pie crust, is I don't like a crisp, well done crust, so sometimes I skip this part, because I like a soggy crust! The egg mixture doesn't seep through, and it still turns out fine. Just very soft.  Yum.  I'm probably weird.

While your crust is par-baking (or sitting raw waiting for you on the counter!), mix up your filling.

Whisk 4 eggs until well beaten, then add 1 cup of half and half (skim milk works fine, too).
Add salt, pepper, and any other spices or herbs you like. A little garlic or onion powder are always good.


Mommy trick:  place veggies (shredded zucchini - water squeezed out, chopped spinach, pre-sauteed mushrooms, bacon, ham, any thing you'd like!) in the bottom of the pie crust.
Add 1 cup of grated cheese (jack, swiss, cheddar...) on top of the veggies into the pan. I really like goat cheese sometimes, too!

Pour the egg mixture into the pie pan over the top of the other stuff.
You can fill it about to the top, since it won't rise much as it bakes.

Mommy trick #2: Sprinkle the top with a dash of nutmeg.


Turn the oven down to 350 degrees.

Bake for about an hour, or until set.


Let cool before eating.
I like quiche warm, like you'd eat scrambled eggs, but it also is great cold, or at room temperature.
(I think I usually just eat it warm, because I am hungry and impatient!) 


Recipe:
Veggie Quiche
Adapted from Imperfect and Fabulous
as well as my  Momma's recipe

  • 1 Pie Crust
  • 4 eggs
  • 1 c half and half, or milk
  • 1/2c-1c shredded or diced veggies of choice 
  • 1 c shredded cheese
  • salt
  • pepper
  • pinch of garlic powder
  • dash of nutmeg


Monday, February 10, 2014

Champagne Soaked Chocolate Covered Heart-Shaped Strawberries

Though I don't currently have a special someone (accepting applications!), I still love making festive holiday treats, and Valentine's Day is no exception.
My sister came over for a little baking extravaganza - best soux chef ever!! - so I could have some fabulous company, and send her home with some treats to share with her boyfriend.


We combined two different recipes, HERE and HERE, soaking strawberries in champagne, and then forming them into adorable heart shapes, and dipping in chocolate. And they were yum!

The heart shape doesn't fully come through until you cover them in chocolate, so hold out hope until then! Although, I'm not going to lie, some of them turn out butt-shaped. Those ones you can keep for yourself ;)
They all taste the same. Amazing!

What you'll need:
(Quantities based on how many you'd like to make)
Strawberries (smaller ones with only a single point at the bottom work best)
Bottle of Champagne (your choice. Prosecco would work fine, too!)
Toothpicks (1 wooden toothpick for each strawberry)
Chocolate (milk, white, or dark)
Couple tablespoons of oil (vegetable, coconut)


Start by rinsing strawberries well, and cutting straight across the tops, trimming off just the stems.


Toss in a bowl filled with champagne, making sure all the strawberries are covered, and let soak for a couple hours. 


They pick up plenty of champagne flavor-flav in that amount of time. The recipe above recommended overnight, but I think they would get too soggy by then, especially since we are cutting them in half afterwards; you need them to hold their shape still.  
We also decided soaking them whole, instead of already cut in half, worked much better.

Remove from liquid, and pat dry with paper towels.


Cut berries in half, from top to bottom, and keeping the halves paired with each other, lay side by side, and stick a toothpick through the sides to hold them together in a heart shape.


 Some strawberries will look much more heart shaped than others, just depending on their natural shape. You can carve a rounded edge on the outer corners if they need some work. If a strawberry is more oval shaped looking at it from the top, instead of a circle, try cutting it the short way, instead of left to right, to get a better heart shape result.
If that made no sense...use trial and error. You'll figure it out!

Once all the strawberries are strung up on toothpicks, melt some chocolate with a couple tablespoons of vegetable or coconut oil in a double boiler pan (or a heat-proof bowl, over a pot of simmering water, if you don't have a double boiler. I use mine only like 3x a year, but it is worth investing in one!) until smooth and melted.

Dip the berries in the chocolate, using two forks, evenly coating all sides. Tap on the side of the pan to remove excess chocolate, then lay on wax paper to set.
Tip: Put a big sheet of wax, or parchment paper on a cookie sheet, or two, so when you are done dipping, you can easily transport them all directly into the fridge to set up.
Once the chocolate is set, they are ready to eat!


You can also melt some white chocolate, dying pink or red, if you'd like, and drizzle it over the tops of the strawberries.


Or you can get crazy, and pretend you are 5, and draw ladybugs and butterflies and hearts on some.
Like I said: no significant other to impress. Haha. So, doodle on these as much as your lil' heart desires. They all still taste the same!


These are best enjoyed within 24 hours or so. After that, the berries get a bit soggy, and the champagne leaks out.  
I still used the 2-3 day old leftovers, chopped up, on top of pancakes, with peanut butter, this morning!
YUM!

Anyway, these make such a fun treat for your Valentine, friends and family, or just for yourself!
We made quite a few, but you can make a few or as many as you'd like. Just adjust the amount of chocolate melted accordingly. And drink the leftover champagne you didn't use to soak the berries.
Actually, we drank the strawberry essence-ed leftover post-soaking champagne, too. We fancy like that.

Enjoy!


Saturday, February 8, 2014

3D Paper Heart Garland for Valentine's Day

More crafts!

I just love all the pretty vintage-looking scrapbook paper patterns I found at Hobby Lobby!


I found another Valentine's Day (or year round!) garland idea from Elizabeth over at Doodle-ee-doo: HERE.


All you need is scissors, double sides tape, and paper. Plus, string to hang the garland.


Start by either printing out a heart shape template to trace, or free-hand drawing your first heart on the "wrong" side of your paper.  You only need single-sided scrapbook paper for this one, as the double sided would be wasted.

If you have a hard time drawing that second half of a heart to make it match the first half, fold a piece of paper in half, draw half a heart, and with the paper still folded, cut it out, and ta-da! A full heart! Don't say I never learned anything in second grade art class!

Anywho, cut out a ton of the same side hearts from paper.

You do want them to be as close as possible to exactly the same size and shape, because you are going to put them back to back, and don't want any overhang.


Once you have a bunch of hearts (To make one 3D heart, you will need 5 flat hearts), fold them all in half, pretty paper side in.


Put two folded hearts side by side, and tape or glue the two wrong sides together, back to back.


Keep going, until you have attached 5 hearts together, and finish the heart by taping the first half to the last half, completing the circle, and forming your first 3D heart!


Kay, is that enough photos to understand the concept? Did ya get it?? Ok, good!


Now, repeat and make several 3D heart shapes.


To hang, glue or tape a piece of embroidery thread or other string into one of the creases of each heart, so they all hang in a row.  If you wanted a horizontal garland, you could punch holes in the tops or sides and string them side by side.


Another great, easy, and cute Valentine's Day craft!


Thursday, February 6, 2014

Paper Heart Garland

In my search for some Valentine's Day crafts that weren't too pink, I found a lot of these paper heart garlands.
The only ones I could find link to adorable Etsy shops, or dead end links, with no tutorial.


So I decided to make my own! And these were pretty easy!

Start out buying several different pages of scrapbook paper, in patterns that you like paired together.  The double-sided paper works best, but most of mine were single sided print, and they work fine.

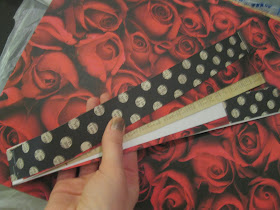
Cut the paper into strips, about 1 inch or 1.5" wide.
When you are cutting strips, you will want to (or not) plan and stack them facing in or out, so the left side of the heart ends up mirroring the right side, and they match.


 I used 4 or 5 strips for each half, so 8 or 10 total.


Stack them in the order you like, then staple together at the bottom.


You will want to cut the tops of the strips, making the inner ones shorter than the outer, because the inner strips have less far to travel to curve inward to form a heart.


Now, the fun part! Get yourself some double sided tape.

Take the inner-most strips, and bend them inward, toward the center, and down toward the stapled center.
Ta-da! A heart!


Continue to do the same with the next strips, until you reach the outer-most ones.


Form the final heart and then put a couple final pieces of tape on the edges to secure everything together.


Done!

Repeat with more strips, and make as many hearts as your little heart desires!


When you have made a few, use a sturdy needle with a big eye, and string them up on a piece of embroidery thread or other string, and hang the garland in a window, on the mantle, or above a bed!


And depending on the color of paper you use, this could be a year round, or at least pretty broadly-seasonal decoration!